Terraform Deployment
Deploy the unusd.cloud read-only IAM Role using Terraform instead of CloudFormation.
Prerequisites
- An active unusd.cloud account
- Terraform installed locally
- AWS CLI configured with credentials that can create IAM resources
Steps
- In the unusd.cloud dashboard, go to Accounts and click Add Account
- Fill in the account details
- In the deployment modal, select the Terraform tab
- Copy the provided Terraform code
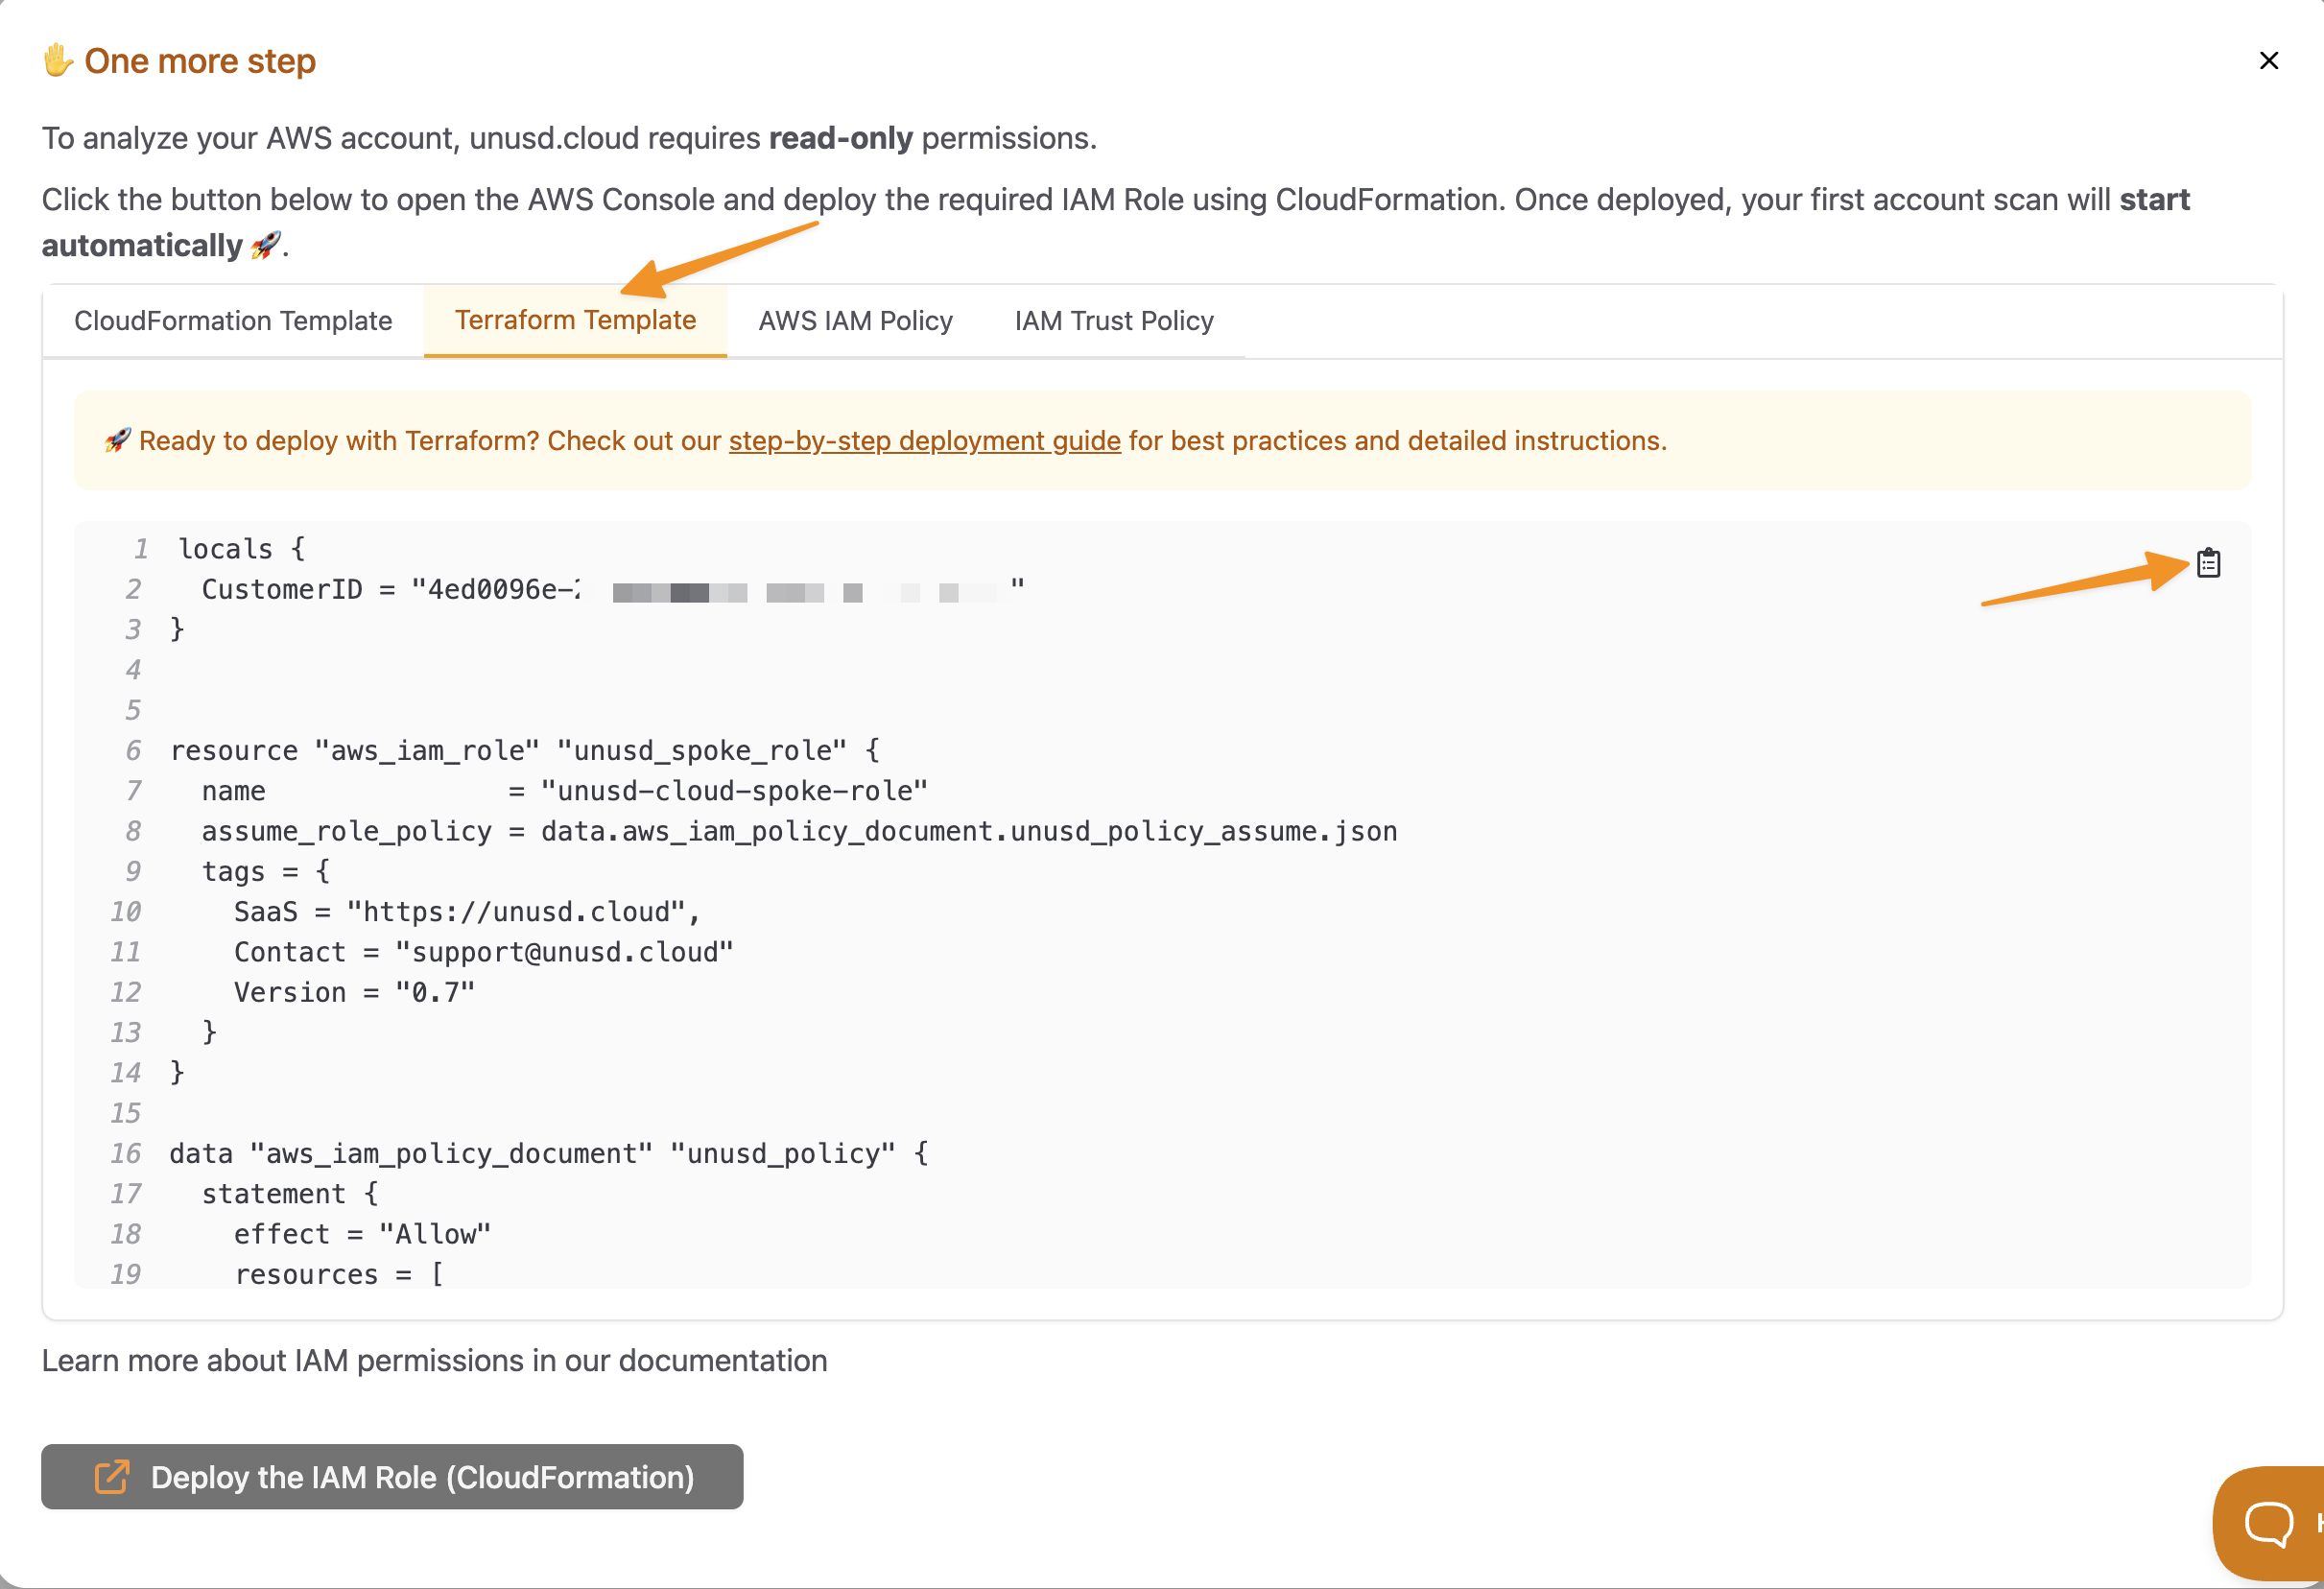
- Save the code to a
.tffile and run:
- Return to the unusd.cloud dashboard and confirm the account is connected
The Terraform module creates the same read-only IAM Role as the CloudFormation template. See our Security documentation for the full list of permissions.
Multi-Account with Terraform
For deploying across multiple accounts, consider using Terraform workspaces or a tool like Terragrunt to manage the role across your AWS Organization. Alternatively, see the StackSets guide for a CloudFormation-based approach.
Keep on chasing 🧡