How to deploy to multiple AWS accounts?
Introduction
AWS CloudFormation Stacksets provide a convenient and scalable way to deploy and manage resources across multiple AWS accounts. In this blog post, we will explore the process of deploying the read-only IAM Role used by unusd.cloud using AWS CloudFormation Stacksets. We will also provide sample AWS CLI commands to demonstrate the procedure.
Step 1: Get the template
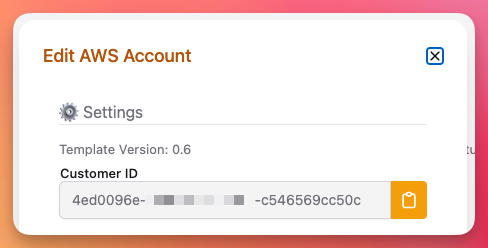
Before deploying the IAM Role, we need to download the Official unusd.cloud CloudFormation template that defines the role's configuration and the read-only permissions. We also need the ExternalID parameter to authenticate your deployment.
The parameter ExternalID on the bottom left of our webapp. (ID:)

Step 2: Create the Stackset
To create the Stackset that will be used to deploy the IAM Role, use the following AWS CLI command:
aws cloudformation create-stack-set \
    --stack-set-name unusd-cloud-spoke-role \
    --region ${AWSRegion} \
    --capabilities CAPABILITY_NAMED_IAM \
    --template-body file://spoke-role.yml
Make sure to replace ${AWSRegion} with the appropriate region code where you want to create the Stackset.
Step 3: Create Stack Instances
Once the Stackset is created, we need to create Stack instances in specific AWS accounts and regions. In this example, we will create Stack instances in the eu-west-1 region and target an Organizational Unit (AWS Org Level) with the ID r-xxxx.
Use the following AWS CLI command to create Stack instances:
aws cloudformation create-stack-instances \
    --stack-set-name unusd-cloud-spoke-role \
    --deployment-targets OrganizationalUnitIds=r-xxxx \
    --regions eu-west-1 \
    --operation-preferences FailureToleranceCount=5,MaxConcurrentCount=5
The OrganizationalUnitIds parameter specifies the target Organizational Unit (OU) where the Stack instances will be created. The regions parameter defines the regions where the Stack instances will be deployed. Adjust these values according to your environment.
Step 4: Monitor Deployment
Once the Stack instances are created, you can monitor the deployment progress using various AWS CLI commands such as describe-stack-set-operation, list-stack-instances, or by checking the AWS CloudFormation console.
Step 5: Add accounts
Following the proper IAM role deployment on your AWS accounts, you can now add each AWS account on the unusd.cloud dashboard as you do for a single account, then skip the role deployment modal as it is already done by the previous steps.
If you have a large amount of AWS accounts, we can automate this part for you. Contact us by email.
Conclusion
Deploying IAM Roles using AWS CloudFormation Stacksets simplifies the process of managing resources across multiple AWS accounts. By following the steps outlined in this blog post and utilizing the provided AWS CLI sample commands, you can quickly deploy unusd.cloud at scale.